2013年1月19日土曜日

Jenkins Parameterized Trigger プラグイン

Jenkins Parameterized Trigger プラグイン

はじめに

  • Jenkins からパラメータを指定・設定してビルドができるようになる Parameterized Trigger プラグインを試してみました。
  • 具体的には、前のエントリ「Jenkins から Google App Engine アプリのデプロイ」を少し修正し、GAE の情報をパラメータで渡してデプロイする形に変更してみました。

Parameterized Trigger プラグインのインストール

プラグインのインストール

  • Jenkins のメニューから「Jenkins の管理」-「プラグインの管理」を選択
  • 「利用可能」タブから「Jenkins Parameterized Trigger pluguin」をチェックし決定

プロジェクトの設定

プラグインを有効化


  • プロジェクトの設定を選択
  • 「ビルドのパラメータ化」にチェック。パラメータの設定ができるようになります。

パラメータ化する項目の追加


  • GAE のメールアドレス用に「文字列」でパラメータを追加、パスワード用に「パスワード」でパラメータを追加

ビルド(デプロイ)スクリプトの修正

SDK=/usr/local/google_appengine
echo $GAE_PASSWORD | $SDK/appcfg.py --email=$GAE_ACCOUNT --passin update $WORKSPACE
echo $GAE_PASSWORD | $SDK/appcfg.py --email=$GAE_ACCOUNT --passin backends update $WORKSPACE$ git 

ビルド(デプロイ)の実行

パラメータ指定画面の表示

  • ビルドを実行後、パラメータを指定する画面が表示
  • パラメータを指定後、「ビルド」ボタン押下でビルドが実行されます。

2013年1月14日月曜日

Jenkins から Google App Engine アプリのデプロイ

Jenkins から Google App Engine アプリのデプロイ

はじめに

Google App Engine アプリのデプロイを、ローカルにインストールした Jenkins から実行する方法を試してみました。

Jenkins プロジェクトの作成

新規プロジェクトの作成

  • 左側のメニューから「新規ジョブ作成」リンクを押下
  • 「ジョブ名」を入力、「フリースタイル・プロジェクトのビルド」を選択し、「OK」押下

ビルド手順の入力

  • 「ビルド手順の追加」から「シェルの実行」
  • 「シェルスクリプト」に処理内容を入力

入力内容

SDK=/usr/local/google_appengine
EMAIL=xxxxxx@gmail.com
PASS="$JENKINS_HOME/.gae_pass"
cat $PASS | $SDK/appcfg.py --email=$EMAIL --passin update $WORKSPACE
cat $PASS | $SDK/appcfg.py --email=$EMAIL --passin backends update $WORKSPACE$ git 

2013年1月4日金曜日

CloudBees Jenkins for Google App Engine (2)

CloudBees Jenkins for Google App Engine

はじめに

前エントリ「CloudBees Jenkins for Google App Engine (1)」の続きで、Jenkins のプロジェクトを作成、GAE へのデプロイまで試してみました。

Jenkins プロジェクトの作成

新規プロジェクトの作成


  • 左側のメニューから「新規ジョブ作成」リンクを押下
    (ゼロからアプリを作る場合は中央の 1, 2, 3 の easy steps を使うのが良いのかもしれない)

プロジェクトの種別の選択


  • 「ジョブ名」に適当な名前を入力
  • 下のラジオボタンは「フリースタイル・プロジェクトのビルド」を選択

プロジェクトの設定 (1)


  • 特に変更箇所はなし

プロジェクトの設定 (2)


  • 「ソースコード管理システム」として「Git」を選択し、リポジトリの URL を入力
    (前エントリ「CloudBees Jenkins for Google App Engine (1)」で作成したリポジトリの URL を入力)

プロジェクトの設定 (3)


  • 「ビルド・トリガ」で「Build when a change is pushed to CloudBees Forge」が選択されていることを確認
  • 「ビルド」の「ビルド手順の追加」から「Deploy Python Application to Google App Engine」を選択

プロジェクトの設定 (4)


  • 「Python Version」で「2.7.2」を選択
  • 「Application Version」に「1」を入力
  • 「高度な設定...」ボタンを押下

プロジェクトの設定 (5)


  • 「高度な設定...」ボタンを押下して表示される「Update Backends」にチェック
    (GAE アプリで Backends Instance を使用しているため)
  • 「保存」ボタン押下して、設定を保存

Jenkins から Google App Engine へデプロイ

Google App Engine への自動デプロイ


  • ローカルのリポジトリを編集・コミットし、CloudBees へ push すると、Jenkins で自動的に GAE へのデプロイが始まることを確認

2013年1月3日木曜日

CloudBees Jenkins for Google App Engine (1)

CloudBees Jenkins for Google App Engine

はじめに

「CloudBees Jenkins for Google App Engine」は、CloudBees が提供するサービスで、Jenkins から Google App Engine へのデプロイができるらしいです。(まだそこまでは未確認)

今回、まずは Git リポジトリ機能のみ使えるようにしてみました。

Git リポジトリの作成

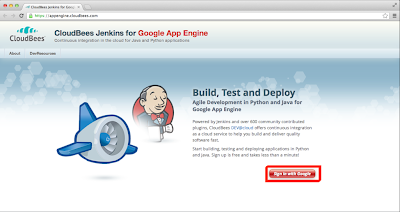
Google アカウントでサインイン


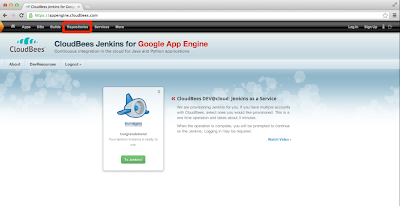
リポジトリサービスを選択


  • サインイン後、上部のメニューから「Repositories」リンクを選択

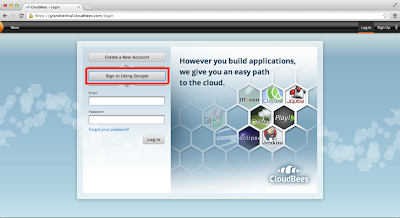
もう一回 Google アカウントでサインイン


  • 何で二回目があるのか、よく分からないが再度 Google アカウントでログイン
    Jenkins for GAE と、CloudBees の共通のアカウント?

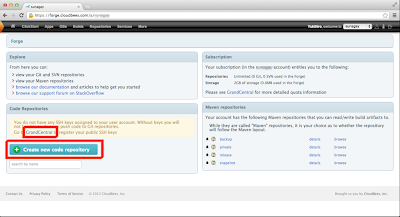
リポジトリの作成


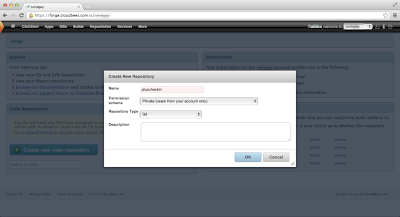
  • サインイン後のリポジトリ管理画面から「Create new code repository」ボタンを押下し、新しいリポジトリを作成する


  • 「Name」部分にリポジトリ名を入力
  • 「Permission Scheme」部分は「Private (users from your account only)」を選択 (非公開として使用します)
  • 「Repository Type」部分は「Git」を選択

作成した Git リポジトリに接続

SSH 鍵の生成

$ ssh-keygen -t rsa
Generating public/private rsa key pair.
Enter file in which to save the key (/Users/Suna/.ssh/id_rsa):
Enter passphrase (empty for no passphrase):
Enter same passphrase again:
Your identification has been saved in /Users/Suna/.ssh/id_rsa.
Your public key has been saved in /Users/Suna/.ssh/id_rsa.pub.
The key fingerprint is:
xx:xx:xx:xx:xx:xx:xx:xx:xx:xx:xx:xx:xx:xx:xx:xx Suna@xxxxxx
The key's randomart image is:
+--[ RSA 2048]----+
|  E+.            |
|  o      .       |
|   .    . .      |
|    o .. o       |
|   + = oS .      |
|    * = +  .     |
|   . o * ..      |
|      = +.       |
|     . o..       |
+-----------------+

$ cat ~/.ssh/id_rsa.pub 
ssh-rsa AAAAB3NzaC1yc……

Cloudbees に公開鍵を設定


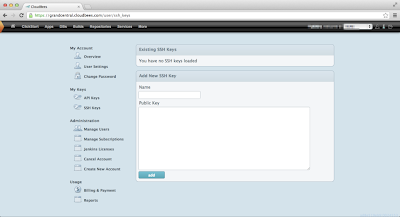
  • リポジトリ管理画面の鍵の設定リンクを押下し、公開鍵をコピー & ペースト

Cloudbees に作成した Git リポジトリのクローン作成

$ git clone ssh://git@git.cloudbees.com/xxxxxx/pluscheckin.git
Cloning into 'pluscheckin'...
Identity added: /Users/Suna/.ssh/id_rsa (/Users/Suna/.ssh/id_rsa)
warning: You appear to have cloned an empty repository.

クローンしたローカルリポジトリにファイルを追加

$ cd pluscheckin
$ git add ……
$ git commit

ローカルリポジトリの内容を Cloudbees に push

$ git push origin master
Counting objects: 39, done.
Delta compression using up to 4 threads.
Compressing objects: 100% (35/35), done.
Writing objects: 100% (39/39), 32.82 KiB, done.
Total 39 (delta 8), reused 0 (delta 0)
To ssh://git@git.cloudbees.com/xxxxxx/pluscheckin.git
 * [new branch]      master -> master

2012年10月1日月曜日

GAE/Python 事始め (2) - webapp フレームワーク

GAE/Phthon 用フレームワーク

はじめに

  • GAE/Python では Web アプリ用に webapp というフレームワークが用意されているので、それを使用して Hello World を書き換える。

「Hello World!」(webapp フレームワーク版)

wmeterserver.py

from google.appengine.ext import webapp
from google.appengine.ext.webapp.util import run_wsgi_app
import os
from google.appengine.ext.webapp import template

class MainPage(webapp.RequestHandler):
    def get(self):
        path = os.path.join(os.path.dirname(__file__), 'template/index.html')
        self.response.out.write(template.render(path, {}))

application = webapp.WSGIApplication([('/', MainPage)],
                                     debug=True)

def main():
    run_wsgi_app(application)

if __name__ == "__main__":
    main()
概要
  • webapp.RequestHandler クラスを継承した MainPage クラスを作成 (6行目)
  • GET リクエストを処理する get メソッドを定義 (7行目)
  • テンプレートのファイルを指定し、template.render メソッドでレンダリング (8, 9行目)
  • Web アプリ本体。リクエストと処理クラスのマッピング (11行目)
  • Web アプリを AppEngine 環境で実行 (15行目)

template/index.html

<html>
<head>
<title>Hello</title>
</head>
<body>
Hello World!
</body>
</html>

まとめ

  • まだまだ Python に慣れない。

2012年9月30日日曜日

Git 事初め (2) - 最低限のブランチ機能

ブランチの作成

ブランチとは?

  • 本流から分岐し、本流に影響なく、開発作業を続ける機能のこと

現状の確認

$ cat wmeterserver.py
print 'Content-Type: text/plain'
print ''
print 'Hello, world!'
$ git branch
* master
デフォルトでは master ブランチのみが存在している。「*」が現在作業中のブランチ。

develop ブランチの作成

$ git branch develop

$ git branch
  develop
* master
develop ブランチが作成されたが、作業中のブランチは master のまま。

develop ブランチへ切り替え

$ git checkout develop
Switched to branch 'develop'

$ git branch
* develop
  master
develop ブランチに切り替わった。作成 & 切り替えは「git checkout -b develop」一発でもできる。

develop ブランチでファイルの修正 & commit

$ vi wmeterserver.py
$ cat wmeterserver.py
print 'Content-Type: text/html'
print ''
print 'Hello'
print 'Hello, world!'
print ''
$ git add wmeterserver.py
$ git commit -m 'text/plain -> text/html'
[develop a4de3c7] text/plain -> text/html
 1 file changed, 3 insertions(+), 1 deletion(-)

ブランチのマージ

master ブランチへ切り替え

$ git checkout master
Switched to branch 'master'

$ git branch
  develop
* master

ファイルの確認(マージ前)

$ cat wmeterserver.py
print 'Content-Type: text/plain'
print ''
print 'Hello, world!'
master ブランチには develop ブランチで行った修正は入っていない。

develop ブランチのマージ

$ git merge develop
Updating e661db9..a4de3c7
Fast-forward
 wmeterserver.py | 4 +++-
 1 file changed, 3 insertions(+), 1 deletion(-)

ファイルの確認(マージ後)

$ cat wmeterserver.py
print 'Content-Type: text/html'
print ''
print ''
print 'Hello, world!'
print ''
master ブランチに develop ブランチで行った修正が反映された。

ブランチの削除

develop ブランチの削除

$ git branch -d develop
Deleted branch develop (was a4de3c7).

$ git branch
* master

まとめ

  • 特定のブランチの状態へ切り替えるのが簡単で感動。
  • 他のバージョン管理システムだと面倒なイメージなのだけど、Git のブランチ機能は使ってみたいと思えた。

2012年9月24日月曜日

Git 事始め

Git

Git とは?

  • プログラム等のソースコード管理を行う分散型バージョン管理システム
  • 詳しくはコチラ。→
    1. Git」(http://git-scm.com/)
    2. Git - Wikipedia」(http://ja.wikipedia.org/wiki/Git)

使用環境

マシンMacBook Air (11-inch, Mid 2011)
OSOS X 10.8.1
GitVersion 1.7.12.1
  • Git は Git 公式サイトからダウンロードしてきた Mac 用を使用。

インストール

Mac 用でダウンロードしてきた「git-1.7.12-intel-universal-snow-leopard.dmg」をマウントし、*.pkg ファイルをダブルクリックしインストール。

$ git --version
git version 1.7.12

バージョン管理事始め

はじめに

  • GAE/Python事始め」で作成した HelloWorld のコードを使用して、Git でのバージョン管理について試してみる。
  • 「分散型」だけど、ローカル環境だけで始めてみる。

リポジトリ作成から初回コミットまで

管理対象とするファイルの確認

$ cd ~/Documents/gae/wmeterserver/
$ ls
app.yaml	wmeterserver.py

リポジトリの初期化

$ git init
Initialized empty Git repository in /Users/Suna/Documents/gae/wmeterserver/.git/

管理対象に追加

$ git add app.yaml
$ git add wmeterserver.py

初回コミットを行いリポジトリに登録

$ git commit -m 'initial project version'
[master (root-commit) e1b7ee4] initial project version
 2 files changed, 11 insertions(+)
 create mode 100644 app.yaml
 create mode 100644 wmeterserver.py

ファイルを修正し、2回目のコミット

ファイルを確認

$ cat wmeterserver.py
print 'Content-Type: text/plain'
print ''
print 'Hello, world!'

ファイルを修正(text/plain から text/html に修正)

$ vi wmeterserver.py

$ cat wmeterserver.py
print 'Content-Type: text/html'
print ''
print 'Hello'
print 'Hello, world!'
print ''

2回目のコミット

$ git add wmeterserver.py
$ git commit -m 'text/plain -> text/html'
[master 81785b6] text/plain -> text/html
 1 file changed, 3 insertions(+), 1 deletion(-)

特定のコミットの状態に戻す

コミットの状況を確認

$ git log
commit 81785b695de2697decdbea13c72247f64e2c442e
Author: Suna 
Date:   Mon Sep 24 01:57:43 2012 +0900

    text/plain -> text/html

commit e1b7ee41582919571f39a47cd356d8045fc167d7
Author: Suna 
Date:   Sun Sep 23 23:58:03 2012 +0900

    initial project version

特定のコミットの状態に戻す

$ git checkout e1b7ee41582919571f39a47cd356d8045fc167d7 wmeterserver.py

$ cat wmeterserver.py
print 'Content-Type: text/plain'
print ''
print 'Hello, world!'

まとめ

  • とりあえず、修正、コミット、戻しの最低限の操作について。これくらいだと Git ならではの面白さみたいなものは感じない。やはり「分散型」ならでは、のところを触ってみないとかな。